Tuesday, October 22, 2013

Y'all Should Read This

Dang, Eric Stone. Too many writers like you and folks might start trying to move here!!

Moving to Mississippi: Demystifying a Most Misunderstood State

by Eric Stone

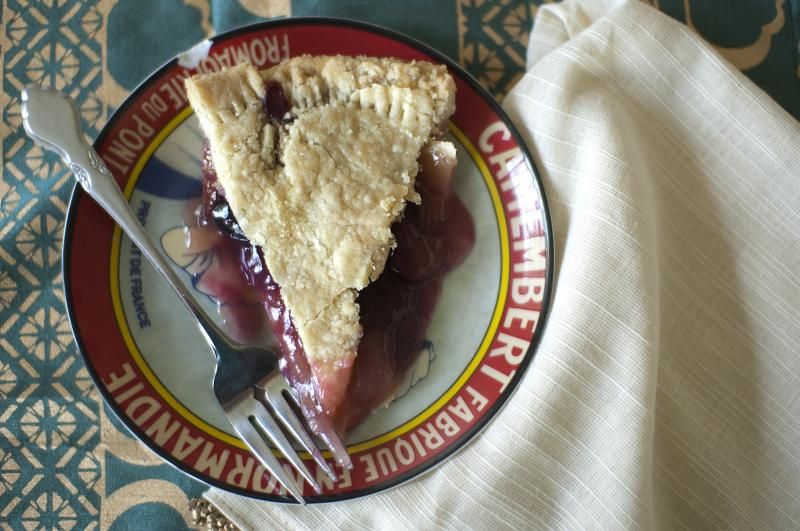
Muscadine Grape Hull Pie

Muscadines, or "scuppernongs" as I've also heard them called (by my grandaddy) are in season at the end of summer, and I've always thought of them as the heralds of what passes, in South Mississippi, as "fall."

Down here "fall" should just be called "slightly less miserable summer."

I don't know many people who do much with muscadines, because although they taste great, they're not as easy to eat raw as grocery store variety grapes. They have VERY tough skins, pulpy innards, and large seeds. Fortunately, when you cook them down, smoosh out the seeds, and then bake them between two flaky layers of pie dough, they soften up considerably, and have a wonderful and unique flavor. This recipe comes from Nancie McDermott's Southern Pies, and the only adjustment I've made is to cut back on the sugar somewhat. Muscadines--or at least, my muscadines--are so sweet on their own that too much sugar actually harms rather than helps the flavor of the pie.

I recommend you add sugar slowly, and taste the filling as you go, until you get it how you like.

Muscadine Grape Hull Pie
Adapted from Southern Pies by Nancie McDermott


Friday, September 20, 2013

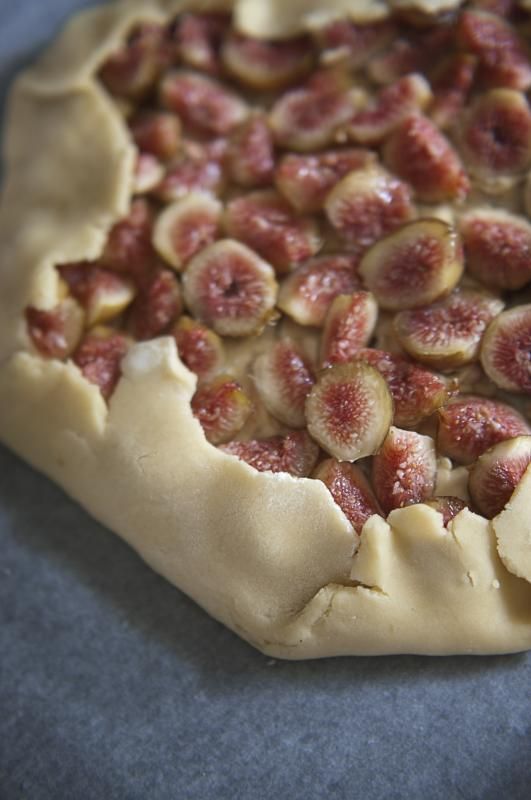
Fresh Fig Galette with Fig Preserve Cream Cheese Spread

When I travel to other regions of the country, I like to notice differences in food. Sometimes it's totally unique experiences, like the kick-ass Mexican food I ate in Tucson, or the wow-we-don't-actually-eat-pizza-in-America moment I had in Italy. And sometimes it's just interesting perspectives on things I generally take for granted, like how lobster, fine dining fare to me, is insanely cheap in the Northeast, or, by contrast, how precious figs are in the same area. Don't get me wrong, it's not that figs aren't special in the South. They have a short growing season and so can't help being that. It's just that they aren't exotic. There's a fig tree in every other yard down here and I don't even remember not knowing the proper way to eat one (ditto muscadines, but that's another post). Also, of course, my grandmama made the best fig preserves (so did her mother, and her mother, etc etc).

A galette is simply a pie that doesn't need a pan. It's free-form, and the edges are folded up around whatever you put inside (typically fresh fruit). You might say it's as easy as...someone else doing your taxes. 

Fresh Fig Galette with
Fig Preserve Cream Cheese Spread
Recipe adapted from kitchenconfidante.com

Monday, August 19, 2013

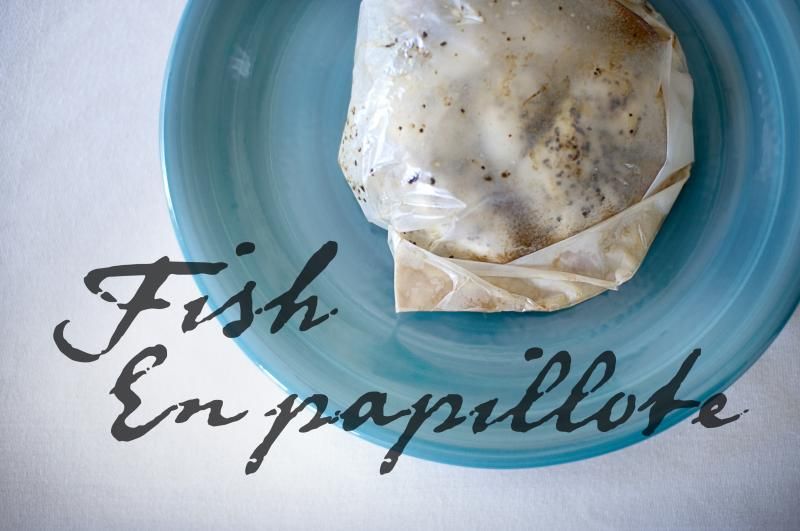
Mississippi Catfish en Papillote

Ok, don't get freaked out by the frou-frou sounding name of this dish. All "en papillote"means is "in parchment," and using it is no different than laissezing your bontemps roulez.

Some French Cajun person somewhere is no doubt having an ear bleed right now.

This is such an easy and tasty dish to make, it's a whole meal in a packet, and it's a snap to customize to individual preference. It's also a great meal for one, since it makes no leftovers. My recipe uses catfish, but you can use any fish you prefer. Shrimp is also fine, though I confess I'm not sure about any other meat. Give it a go if you're feeling adventurous, though with chicken especially I'd err on the side of caution and maybe use a meat thermometer. The same flexibility applies to the starch: I used brown rice, but you can use anything you want, or nothing at all. Couscous is nice, as is quinoa or small pasta. Like I said, easily and infinitely customizable.

Mississippi Catfish en Papillote
Serves 4

An Unexpected Weight Loss Strategy

The food culture in France (and in many other countries I'm sure, though I don't know them as well) appeals to me immensely. Not even necessarily because of what they eat so much as how they eat. It's such a lovely, calm, ritualistic affair. But for the life of me I could not figure out how to recreate it in my home. Surely eating like that breaks the bank, I thought. Or is horribly time consuming. How can you possibly eat things that are delicious and satisfying without gaining a bazillion pounds?? (The answer to this last question, by the way, is that I did not until recently understand what "delicious" or "satisfying" actually meant.)

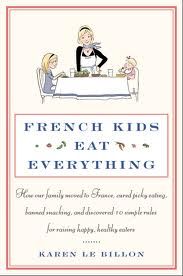
Then I read this book:


And I realized that the reason I couldn't understand what the French do is because I'm an American, and our young country lacks much of what most older peoples have: a deliberate food culture. Thanks to this book (which I read twice) I am able to better understand how French children are raised, and divine, by way of comparison with my own home learnin', why French adults behave so differently with respect (and I do mean respect) to food. I originally picked up this book as a curiosity, and began following the guidelines therein because they sounded nice, but y'all, ever since I've begun implementing these new habits in my home, I have lost a steady 1-2 pounds per week. I hate to make it about weight loss, because it's so much more than that, but I am someone who has unsuccessfully "dieted" since she was 5 years old, so to me this is HUGE (no pun intended. Ok, pun intended. Ha, ha, freaking ha).

I have not counted a single "point" or calorie, have not sacrificed entire food groups, have had no sense of forcing myself to do anything. There has been no artificial sweetener, "diet food," or low fat dairy. I'm just learning to pay attention to and take pleasure in the experience of eating, and I'm finally learning the completely intuitive art of listening to my own body's signals of satiety (my home was one of those "clean your plate" deals). These new habits result, with no direct intention on my part, on better quality, more variety, and smaller portions. And I have NOT started spending more money on food, nor more hours in the kitchen (quite the contrary, actually).

Y'all, I am experiencing a personal revolution. That's why I just had to take time out of my usual recipe posting to share this long-winded narrative. Thanks for your patience! In keeping with the theme, here's two French recipes to express my appreciation:


Wednesday, July 10, 2013

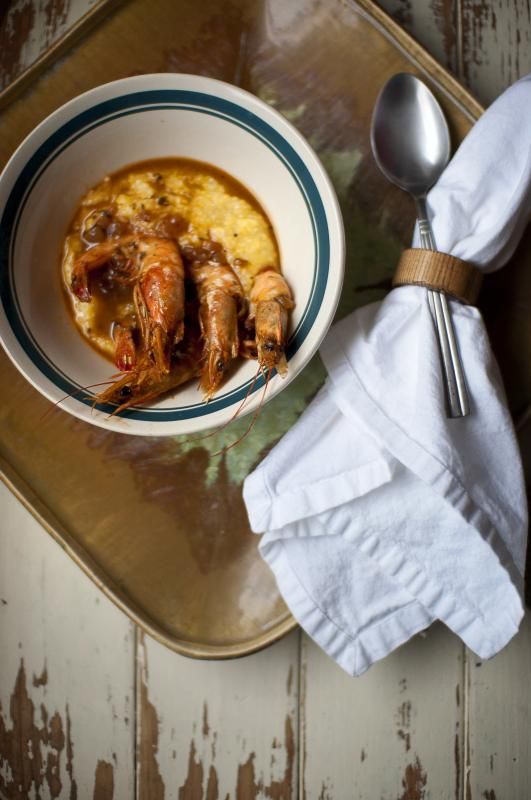
Barbecued Shrimp and Grits

I must be honest. I do not know why this dish is referred to as "barbecue." These shrimps go nowhere near a grill; nary a sweet and tangy sauce is applied. What it probably should be called is "Freaking Butter for Days Shrimp and Grits."

But I was taught this is barbecued shrimp and barbecued shrimp it shall remain.

I was first introduced to this recipe while working in a fine dining restaurant here on the Coast. Barbecued shrimp and grits is insanely good and impressive to company and it is SO easy to make. Don't be intimidated if you've always thought this was labor or time-intensive. Can you melt butter? Can you boil water? You can make shrimp and grits.

Barbecued Shrimp and Stone-Ground Grits
Recipe adapted from steveharveytv.com

Sunday, June 16, 2013

Happy Father's Day!

Thanks, Dad, for your willingness to taste whatever I prepare.

(though I believe the concoction in this particular bowl was yours)

Happy Father's Day!

Friday, June 14, 2013

LARD. And Some Strawberry Shortcake

Ohhhhh, lordy. It. Has. Arrived. What is it, might you ask? A coveted new cookbook, a new car, my own personal set of wax wings??? No, dear readers. Something far more exciting:

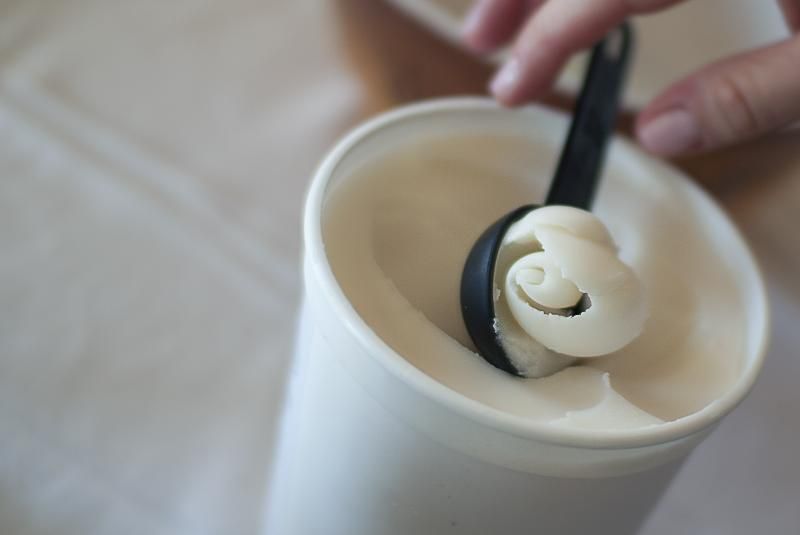
My lard.


A relevant (you'll see) digression: driven to distraction by the horrific photos and stories  that I've absorbed over the years of animals living in squalor and inexcusably mistreated, I've all but given up industrial meat and dairy products. I won't get into the details, because that's not what this blog is about, but trust me, I'm not being hoity-toity here. That said, I've not given up meat and dairy altogether. Every couple of months my mom places a large meat order to a company called U.S. Wellness Meats, a Missouri-based farm. It's awesome. You should support them with your monies. The animals live as they should, with respect to their species. They sell, among other things, pork products. And pork products include lard.

Have you ever had biscuits, a pie crust, anything made with REAL lard? I bet you haven't. I hadn't, either, until about a year ago when my friend Christine made the best pie crust I have ever had so help me god and she made it with lard. I became a convert and will not go back.

So with this last meat order, I had mumsy order me some lard. Which got me thinking, I sure would love some strawberry shortcake. Made with biscuits (lard!), naturally, because we are in the South.

Lard Biscuit Strawberry Shortcake. With Lard.


Wednesday, May 29, 2013

Southern-Style Wedge Salad


The wedge salad has always confounded me. Here is why: its incredibly easy to make, and the ingredients are laughably inexpensive, yet time and time again high-falootin' restaurants get away with charging patrons a buttload for it. I get the sense that the inventors of the dish put it in front of the first unsuspecting patron saying,"That'll be...ten? dollars...?" And then masterfully disguising their astonishment when said patron did, in fact, fork over (har har har) the requested monies. It's borderline sinister, I tell ya.

So now that I've busted all those rest-o-rawn-tays and am probably blacklisted from most of them, it's also fair to say that the wedge salad is delish. Something impressive to throw together as a meal or first course or what have you. And in this recipe I've dispensed with the traditional bacon and bleu cheese in favor of Southernized andouille sausage and my own pimento cheese dressing, of which I am so proud.

Also, this recipe maaaaay or may not have been printed in the Community Recipes section of June's Southern Living. (squeal!!!)

Wedge Salad with Pimento Cheese Dressing and 
Andouille Sausage

Monday, April 29, 2013

Digger's Diary #7: Troubleshooting Seedlings, Square Foot Gardening, Me VS the BIRDS

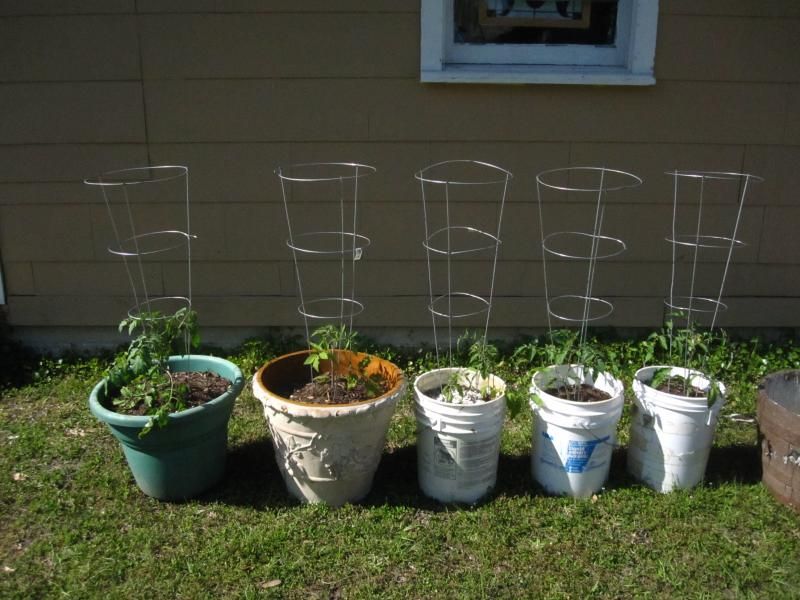
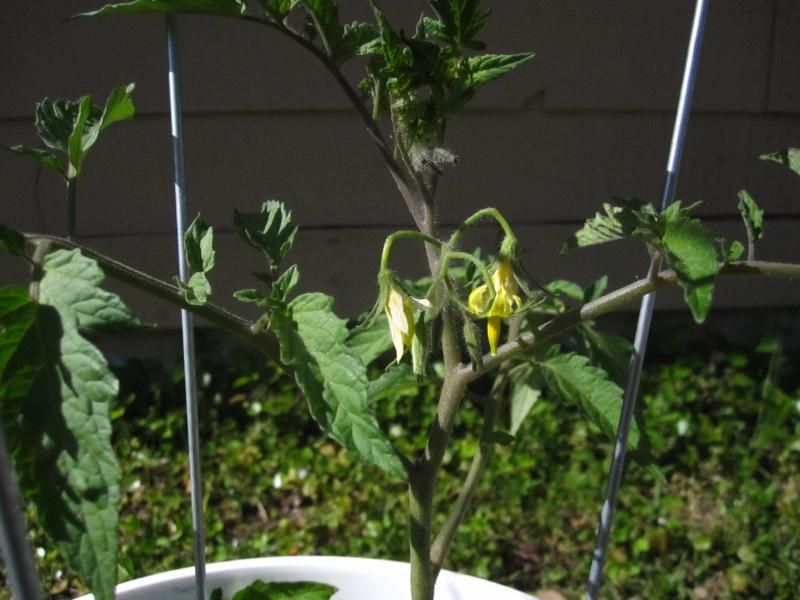
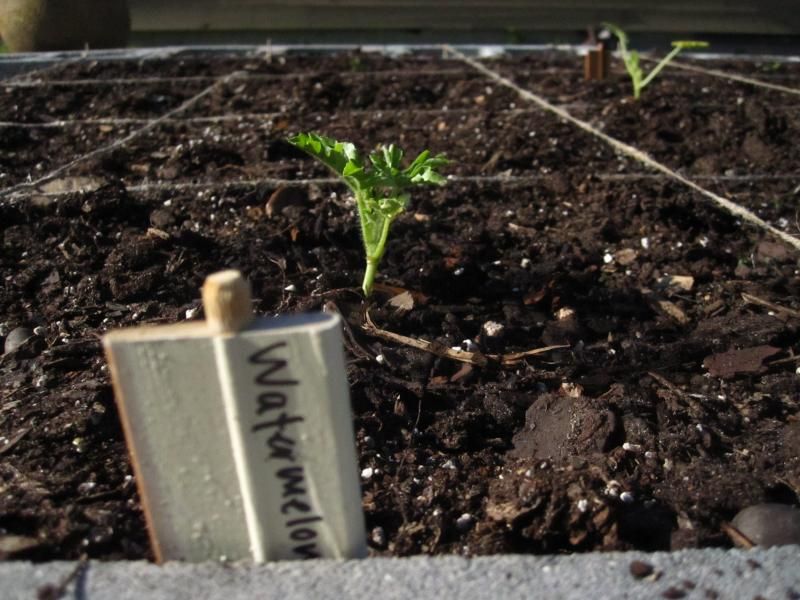
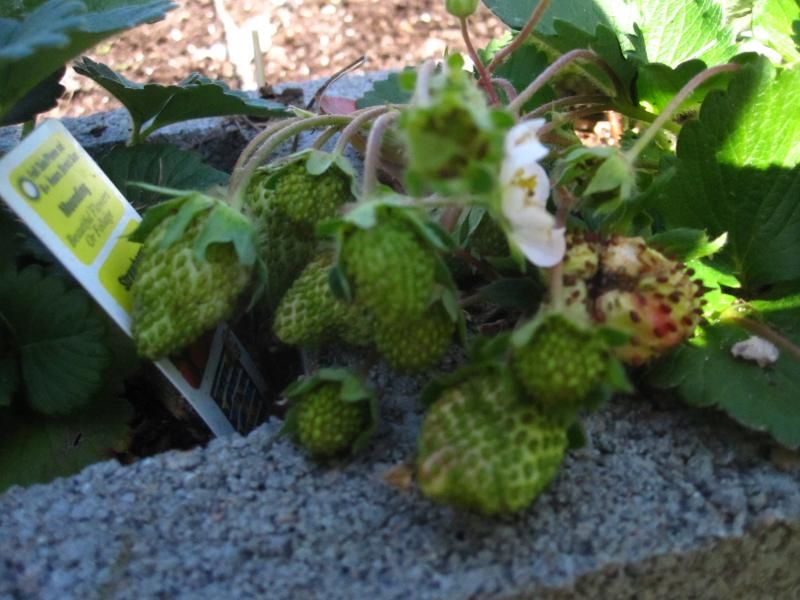
Everything's looking relatively good. The tomato plants I got from my neighbor are budding with flowers and two even have little tomatoes, the strawberries look fab (except for where some a-hole bird pecked at a couple of them...more on this later), and I think I've figured out what was wrong with my watermelon, cucumber, muskmelon, and squash seedlings. See, about a week before I FINALLY got them into the ground, they were so yellow. They weren't droopy or diseased looking, but their color sucked. I thought it was just because they were becoming root bound and had sucked up all the available nutrition in their little newspaper pots, but transplanting them didn't help. I tried watering with very weak fish emulsion-nothing. My friend suggested fish meal, but when I went in search my purveyor had none. I got some worm castings instead and side-dressed the transplants with it, working it gently into the soil immediately around them. For those of you who don't know about worm castings-it is the poo. Literally. It's worm poo. But it's odorless and not gross at all and so rich in nutrients you can't actually plant anything directly in them. After the side dressing I watered generously, and in the next few days I noticed improvement in their color. Still not much growth, although the squash appear to have a few promising (albeit premature given the size of the plant) buds. The tomatoes and peppers I grew from seed are progressing nicely, and the basil is beginning to show true leaves.


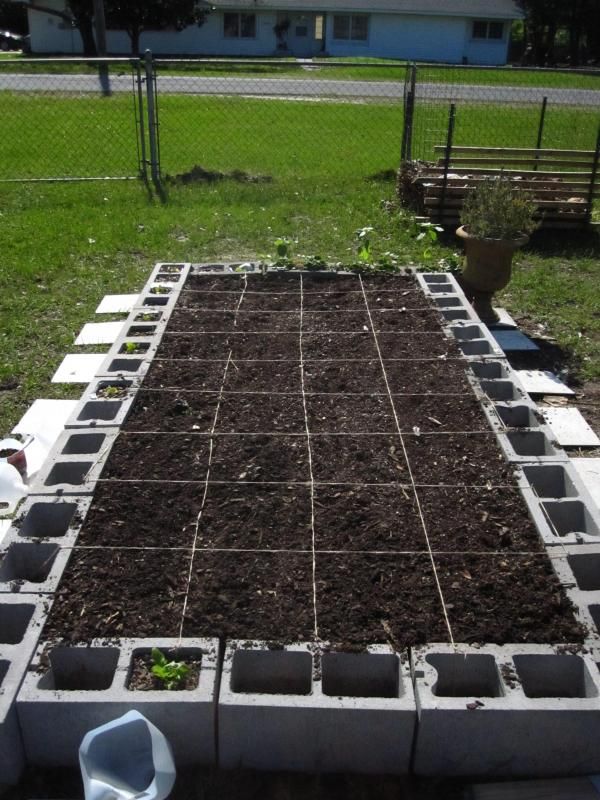
Square Foot Gardening: this is a concept I've read about in several places. The basic idea, as I understand it, is you take a perfect square or rectangle space and divide it into however many 1'x1' spots as you can. Using this chart, you determine how many of each of your plants will fit into each square. I.e. something like 4 carrots but only 1 squash will fit in a 1'x1' area. It seems hard to believe to me, but since I don't have a lot of space I'm giving it a go. I rearranged my cinder blocks to give me a 9'x4' internal space, and then marked the squares off with twine. Next I put the plants in based on the chart. I don't currently have enough space to fill the garden, so I gave them more space than true square foot gardening apparently needs, but we'll see just the same.


Last week I spent over an hour digging holes, burying posts, and cutting and stapling bird netting around my garden. This is to keep out the birds and the cat. Dang birds keep getting at my strawberries. Dang cat just walks straight through it like there aren't OBVIOUSLY things going on in there that don't need the input of his rotten kitty paws. He'll never know how that bird netting saved his life.


So that's the latest!

Friday, April 26, 2013

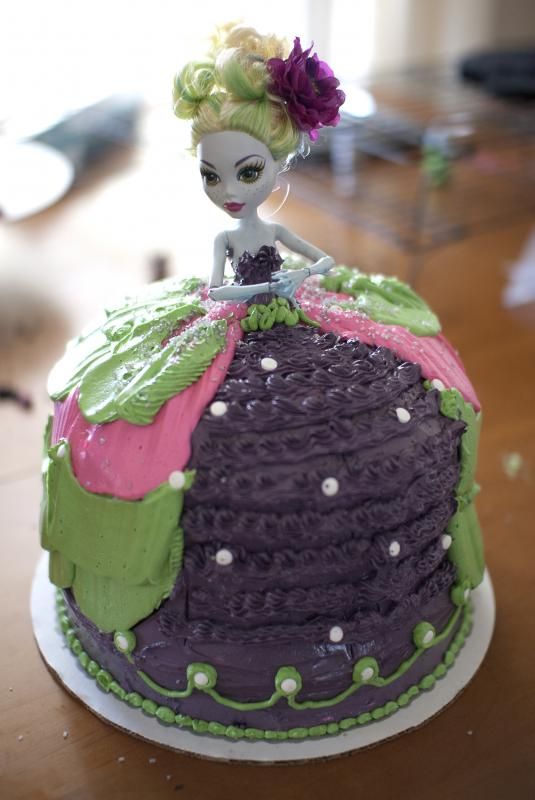
Aidan's Monster High Doll Cake

A good friend of mine has a (now) ten-year-old daughter who loves some show called Monster High. Maybe those of you with ten-year-old daughters have heard of it? Or those of you who are ten-year-olds at heart? Because I am a geezer, I had not heard of it until said good friend asked that I make a birthday cake for her kiddo with a Monster High theme. Soooo I got to researching, even going so far as to watch an (1) episode of the show.

I am not a fan.

Buuuuut I can see how a ten-year-old would be. Anyway. I've always seen these barbie doll cakes that people make with a doll shoved down into like 10 layers of cake flared to look like a huge ball gown and I said to myself, "Self, now that's whatcha need to do." Doll + Insane Amounts of Cake and Frosting + Mad Neon Colors of Monster High = Yessssss.

The result? Let's just say that a) I have never, never, never made such a huge mess of my kitchen. Every single utensil was dirty, furniture was moved, there was neon pink frosting on the ceiling...you get the idea. B) that was the heaviest freaking cake EVER. And forget trying to put it in a box. HA. A box. And c) guess what revisits you at your oh-so-private constitutional the morning after you eat black velvet cake with multiple colors of neon frosting? Yeah. Just...yeah.

But it was also really fun to make and a huge hit at the party. So with no further digression:

Black Velvet Cake with Vanilla Buttercream Frosting
Shaped like Monster High Ball Gown

Wednesday, April 3, 2013

I Am Mississippi

Great post by a fellow Mississippian:

I Am Mississippi

Digger's Diary #6: Inevitabilities of Becoming a "Gardener"

The first thing you must accept, when beginning to pursue the status of "gardener," is that you WILL be laughed at. And made fun of. I don't know why this is, but just about everyone, from hillbillies to radio personalities, has made it their business to let me know I am an idiot. No matter what I ask, be it a legitimate question or one which, in retrospect, I too realize was ridiculous, almost everyone responds with impatience, incredulity, or condescension. And half the time they don't even answer me!

Me: "what exactly does it mean to 'harden off' a plant?"
Gardener: "well--it means hardening off!!"
Me: O_O

Now, before I go painting all these people in a poor light, don't get me wrong. They are nice people and they want to help. And they will answer any question you have, insomuch as they can. But darned if they haven't all either been raised on a farm or completely robbed of their memories of having to learn this stuff themselves.

So, you will be laughed at. Get used to it, and don't let it stop you from asking questions. No matter how stupid.

The second thing: you will become a hoarder. You will. And here's why: gardening can actually become a terribly expensive occupation if you buy everything you need, and if what you buy is always whatever is actually intended for your project. Case in point: you want your tomato plant in a container. Non-hoarder: go to Lowe's, spend $40 on a good-sized planter, done. Hoarder: scour the alleys around your house like a filthy bum until you find a discarded bucket, suitcase, broken garbage can, or what have you that a) is the right size, b) can be drilled, and c) will hold dirt. And sometimes, as in the case of my 11 gorgeous discarded (not even broken!) old windows, you will find a find that you don't even have an intended project for. But god is it a FIND. Ditto the old rusty nail-filled carpet boards I scored off the side of the road. These have become the front of my compost bin. For freezy. Fills my heart with joy.

Accept these things, my friends. They, along with heartbreak over dead plants, fury at the neighbor's cat who WILL dig up your garlic and use your planter as a litter box (a**hole), and a host of other emotional extremes are the inevitable gardening experiences that I've finally come to accept. Le resigned sigh.

Monday, March 25, 2013

Easter Coconut Cake

Question: have you ever eaten coconut?  No, no. The bagged junk doesn't count. Who knows how long it's been there, or what kind of adulteration it's endured. So much flavor and texture is lost. That's why I prefer this recipe, which calls for the processing and use of your own fresh coconut. It's a bit of a hassle, but once you get the hang of it it's not hard at all, and believe me-

Believe me-

you'll be glad you did it.

I love making cakes in general, but coconut cake is among my favorites. It's a complicated procedure, sure, but to me that makes the successful final product that much more exciting. The recipe I use is directly from Good Eats, no alterations. We now refer to Alton Brown as "Uncle Alton" in my family  due to how many of his recipes and methods we have adopted, and his coconut cake is the best I've had. The only amendment I made was that I used two coconuts, just to be sure I would have enough.

Coconut Cake with Fresh Coconut and Seven Minute Frosting
(Easter-ized)


Digger's Diary #6: Tomato/Pepper Panic, New Dirt

Latest updates:

1. EVERYTHING is up! Every seed I planted sprouted. Rather than planting more than one per pot, I just planted one seed per pot, and more than I needed. That way I don't have to thin them. I'll just keep the healthiest ones and give the others away (if anybody wants them). The tomatoes and peppers don't look so hot (I'll get to that in a minute), but the squash, cucumbers, watermelons, cantaloupes, marigolds, nasturtiums, and sunflowers are doing great. I didn't plant strawberries from seed, but the transplants I brought home from Lowe's are also doing well and have started to flower. Also one of my lavender plants is in bloom and the snapdragon looks great too.
  2. It's too cold for hardening off. Memo to self. Everything came back in. Christmas lights/kitty litter was reassembled. Le sigh.

3. After days of keeping an eye out, and sometimes actively searching for cinder blocks, I gave up over this weekend and just bought them at Lowe's. I have to say, though, that I'm not sorry. I set them in their spots around my planters and looking at the beds just makes my heart sing. Based on what I've seen from the strawberry pots, I'll definitely be lining the insides of the cinder blocks before I add the dirt. Cement is a thirsty animal.
 4. I bought a truckload of topsoil. It's not pictured here because it's still...in...the truck. I know you think I'm crazy and/or stupid for buying dirt, and maybe you're right. But I don't trust the quality of the dirt around my house, and this stuff looks good. And I WILL be taking it with us when we move. Along with my compost.

5. I'm trying desperately to help my sad-looking tomato and pepper plants along. I can't decide what they need. They're in the same conditions that are making my watermelons, cantaloupes, cukes, and squash thrive. I'm watering them regularly enough. Here's a picture of one of my tomato seedlings. Maybe one of you out there can help diagnose the issue.

 6. Supplementary to #5, I am moving my tomatoes and peppers from the newspaper pots to "greenhouses" made from upcycled milk jugs, based on this tutorial. Two blogs I've read have used these, with excellent results. Particularly in the tomato department. So.


Tuesday, March 19, 2013

Digger's Diary #5: Plants Go Outside

Greetings and sorry for the long silence! It's been a busy month, getting ready for spring. I'm pleased to report that almost all of my seeds germinated! And several of them now have "true" leaves in addition to their seed leaves. To recap, the seedlings I have right now are

2x cucumber
4x watermelon
4x tomato
4x bell pepper
8x lettuce

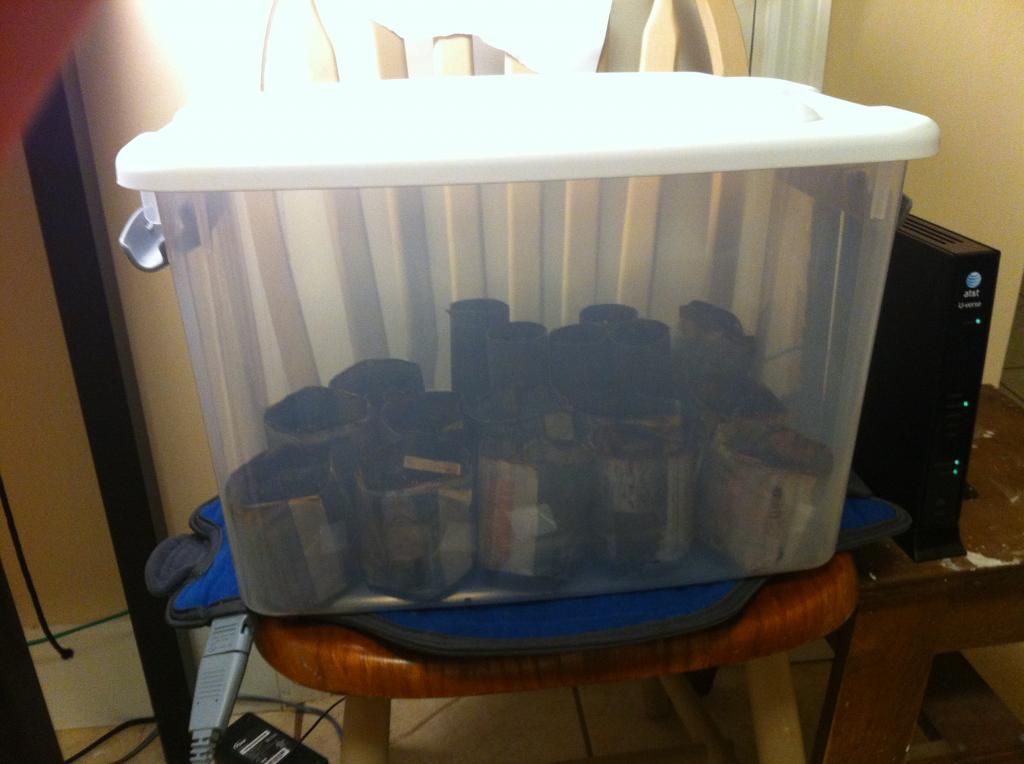
Flowers, cantaloupe, and squash in "greenhouse." This rig, with the lid on, sits inside on top of a heating pad until everything has popped up.


On Saint Patrick's Day I planted marigolds, nasturtiums, two kinds of sunflower, cantaloupe (or muskmelon), and yellow summer squash. They're germinating in the makeshift greenhouse as we speak. Also I purchased 6 strawberry transplants and put them in 3 of the 4 cinder blocks I've used to start my raised bed border. We'll see how they do; mixed reviews on the web.

Now for the most exciting news: my germinated seedlings are OUTSIDE. About a week ago I turned off the grow lights, removed the Christmas lights and almost all of the kitty litter, and moved my babies out into the world. Since then, they have been under the filtered light of the oak tree in our backyard, protected by two old windows I have teepeed over them. And the last two nights they've stayed out all night. I know I am probably babying them too much, but Y'ALL. It really is like what I imagine the first day of kindergarten feels like for parents. Also I didn't plant much more than I need, so it would be pretty tragic at this point to have a major loss. See update on this here.

Friday, February 22, 2013

Digger's Diary, Entry #4: I Humbly Buy Fluorescents

If you've been keeping up with my progress, you know I kicked off this venture with a plastic bin full of kitty litter and Christmas lights, with my seeds in seed starting mix in homemade newspaper/toilet paper roll pots on top, and a round grow light hanging above it all. It seemed like a darn fine system at first, for one who doesn't know what she's doing. And in fairness, the kitty litter/lights combo is probably ok, and the biodegradable pots work well. But that little light just isn't cutting the mustard when it comes to my newly sprouted seedlings. Remember those lettuce seedlings I was so excited about? Desperate to get to the out-of-reach grow bulb, they became leggy and weak, and I sealed their fate with my overzealous "everybody outdoors!" jaunt. Fjord. They are no mas.

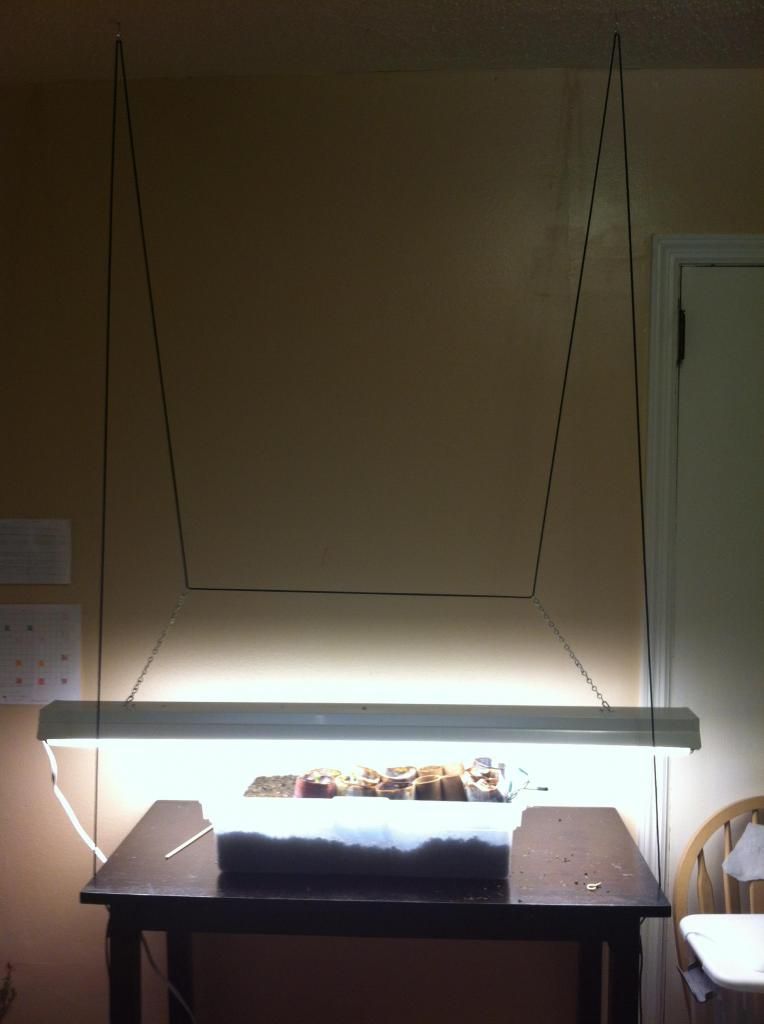
Fortunately, the name of this game from the start has been "trial-and-error" (emphasis on the error), so onward we forge. Last night, with what meager monies remained in my bank account, I bought a cheap shop light and some fluorescent bulbs (like all of the reputable tutorials told me to do from the beginning. I know, I know). Once home, Adam helped me rig the light so it dangles 2-4 inches from the tops of my plants. They're happy now. Needy little things.

Before:


After:


Much better. And adjustable, so as the plants grow I can raise the light. (Yes, that's how close the lights have to be to the tops of the plants).

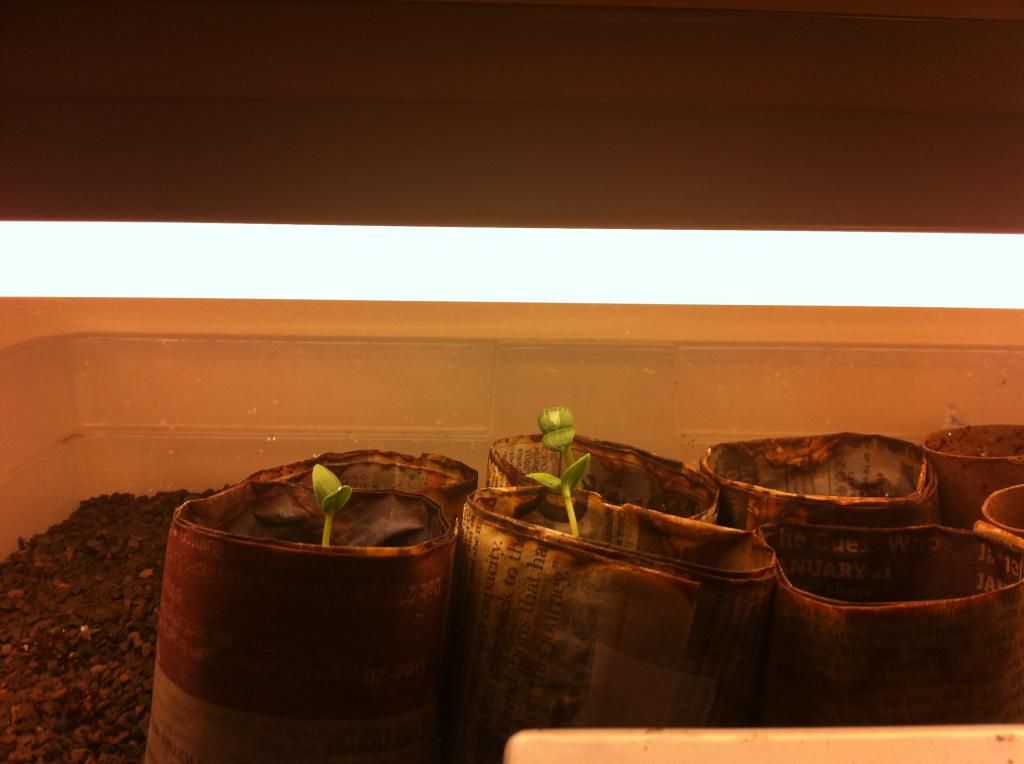
Also, for the guys that haven't quite sprouted (bell peppers, one tomato, a few lettuces, and a cucumber):


Plastic bin on top of a heating pad set to a low temperature, with sowed seeds inside. Warm and humid. Cozy, even.

What I learned: seedlings need coddling. Soooooo much emphasis on that. I didn't appreciate just how much. I thought they'd be tougher if I raised them with a bit of a laissez-faire attitude. NOPE. Don't do that, people. Seedlings are like kidnappers or terrorists. GIVE THEM WHAT THEY WANT. Your life will be easier.

Check the Gardening 101 section of my blog for some new links to websites that set me straight on seed starting.

Tuesday, February 19, 2013

Digger's Diary, Entry #3: Let the Questions Begin

First, an update: lettuce seedlings still look strong, if a bit leggy. After some research, I've learned they look like that because they haven't been getting enough light, so today everybody's going outside for some natural rays. I removed the lettuce pots from the rest of the seeds since they've already sprouted, and put the tray with the ungerminated seeds inside a loosely closed plastic bag. This creates the warm, humid, greenhouse-like environment that the seedlings must have to germinate. As each one begins poking its head up, however, they are to be removed from the greenhouse and put under 16 hours of light, with the light source positioned very close to the leaves. So I'm thinking I'm going to have to rethink my lighting situation, or at least buy another light like the one I have so that the plants don't have to reach for it.

I also found a wonderful blog that helped me sort out my seedling issues. Here she is: Northwest Edible Life: Seedstarting 101

Now, my questions. The compost bin is going, and the seeds are starting, so it's time to really get to work on my bed. I originally thought I would put all the plants in-ground, because it seems to me that you undo all the financial benefit of growing your own food when you have to shell out a ton of money for raised bed materials. But the general consensus seems to be that in-ground beds aren't even worth the trouble, while raised beds solve everything. I'm fine with the idea that raised beds make better quality plants, but I just can't get past the expense. Are they really that much better? The material to make the raised bed (cheaply bought or re-purposed boards or cinder blocks are ideal) isn't that off-putting, it's the material that goes in the bed. My own in-ground dirt is free, and I don't shy from the idea of the labor it will take to cultivate it. But garden soil from the sto' is not cheap, y'all, and to have a garden of any real size you need a ton of it. Maybe literally. So you see, I am at an impasse.

Ponder, ponder.

Sunday, February 17, 2013

Digger's Diary, Entry #2--The Compost Bin and Seeds A-Startin'

Ladies and gents! I now have (drumroll, please) a compost bin! I know, I know. Even with its gorgeously crafted chicken wire sides, you can barely contain your excitement. Me neither, it's ok. 

 My compost bin is 4x4', made of chicken wire zip-tied on 3 sides to metal stakes. The fourth side is open so I can easily turn the compost, and as the pile grows I'll be putting wooden slats across it to form an ever-growing fourth wall. Currently there's an unattached piece of chicken wire across the front, just to keep the neighborhood critters from getting at the food scraps. That's it, nothing fancy:


As for my seed starting set up, I used this tutorial to create cheap biodegradable "pots," and this tutorial to make a self-warming bed. Here's my result:


I actually already have some lettuce seedlings coming up!! It is freaking magical to me that what looks like a speck of dust has the ability to become food. Just amazing.

Till next time! 
  

Tuesday, February 12, 2013

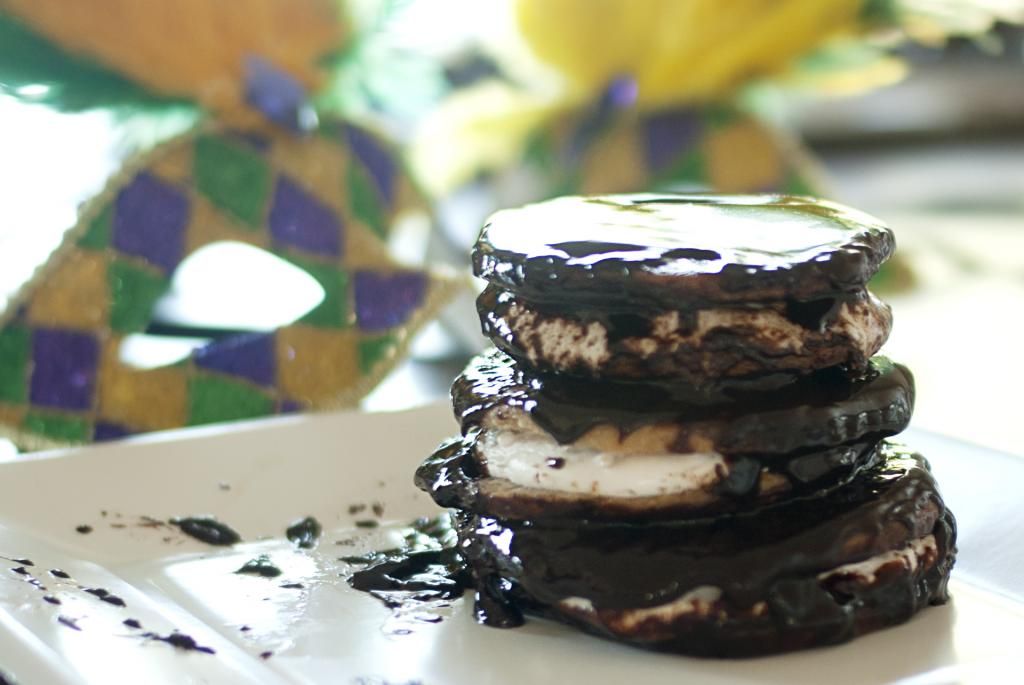
Homemade Moonpies

Happy Fat Tuesday, y'all!! I LOVE Mardi Gras. Even more than-dare I say it?-Christmas. I love the crowds, the madness of the parades, and the fact that no matter how drunk or disorderly someone gets, he will turn around and give his beads to any little kid who wants them. (If he doesn't, the rest of us simply attack.) And even though it is POURING rain today, we will still be partying, undeterred. That's just how we roll.

I also love the parties, the excuse to drink before noon, and, of course, the food. I've already shared with you my Brioche King Cake with Apple Cinnamon Cream Cheese Filling recipe, and now it's time for the Holy Grail of Mardi Gras food: Moonpies. One word. Utterly decadent, these inside-out glorified s'mores have been the key to my heart since forever. My interest in having plastic beads winged at my head at 90 mph has waned in the last few years, but I will chase down the float that's throwing Moonpies. They are no good if bought from the store; they must be caught mid-flight from a Mardi Gras float.

Or, of course, made from scratch.

Homemade Moonpies
Recipe credit: Dixie Caviar