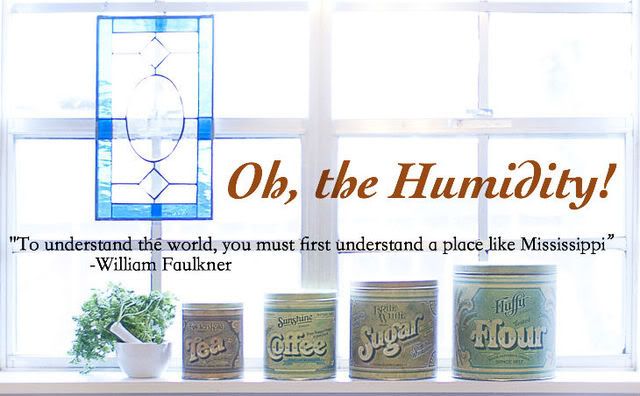
Because everybody loves Red Velvet Cake. And almost everybody (these days) is gluten-free.
The office where I work celebrates its employees by having a birthday party a month for the appropriate folks. When there are more than 3 in a month, or we're just wanting extra reasons to shirk work and eat cake, we have multiple birthday parties.
Goes without saying, those months are the best.
Now because the people I work with are patient, accommodating, and selfless (practically sainted), they allow me to butt into their lives enough to actually make their respective (usually gluten-free) birthday desserts, thus foregoing their shot at the decadent cakes available at any one of our several fabulous bakeries. I imagine they do this with the same mindset as when they allow their small, begging children to decorate the Christmas tree:
"This is NOT going to go well, but it means so much to them. Why not." Beer swig.
The results are pretty much the same, too: only the bottom gets decorated, I may or may not lose interest halfway through (and subsequently half ass the rest), and I never know if the outcome is really any good because everyone's pretty much obligated to gush over it. Also I make a huge mess and lick everything.
So.
The most recent of these little adventures was a red velvet cake I made with Better Batter brand gluten-free flour (we have some wheat allergies around the office). BB swaps 1:1 with all purpose flour and requires no additional ingredients. Also there's no funky taste to it like with some gluten-free flours.
Who shall remain nameless.
Ahem.

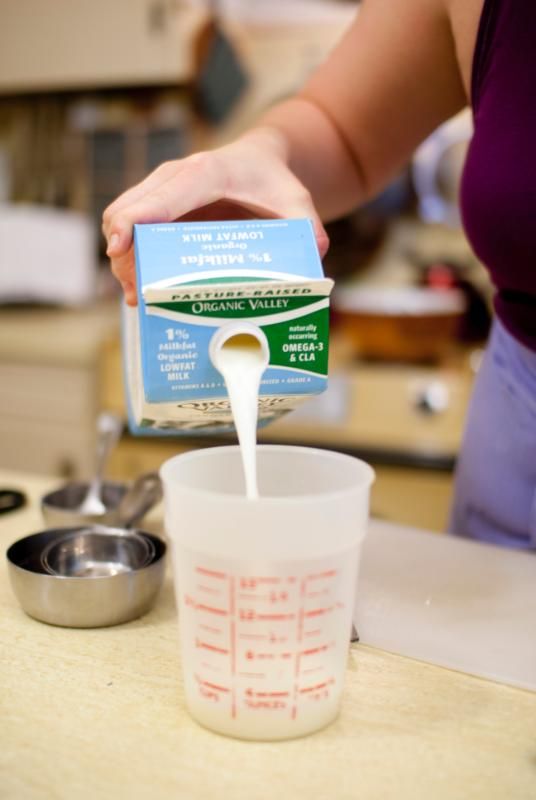
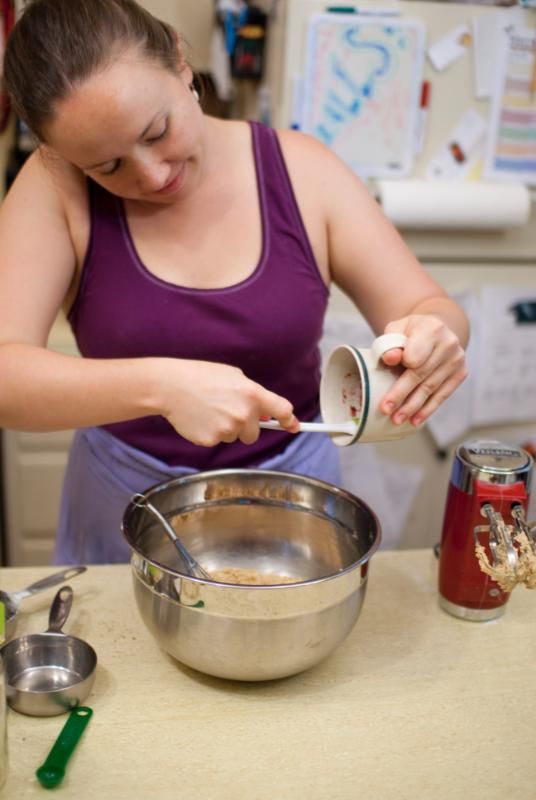
Measure out the milk, then add the vanilla and stir.
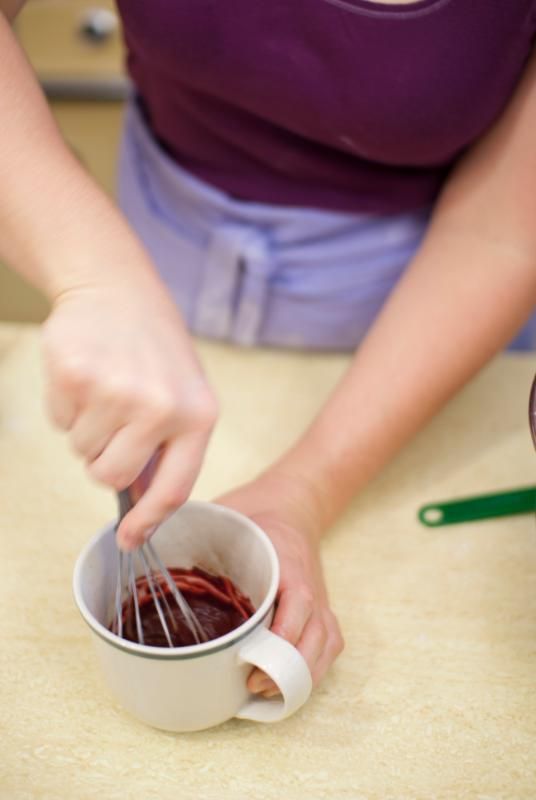
Mix the cocoa and red food coloring together in a small bowl...er, coffee cup. Again, whatever works! Stir until you bust up all the lumps, and holler at me if you managed to keep the dye off you. Because you must have some kind of dark magic to accomplish that and I think we should be friends.

Also a bonus #3: If you have yard eggs like I did, make sure you wash them with soap before using them. Chickens just ain't go no home learnin' and they WILL give you dirty eggs.
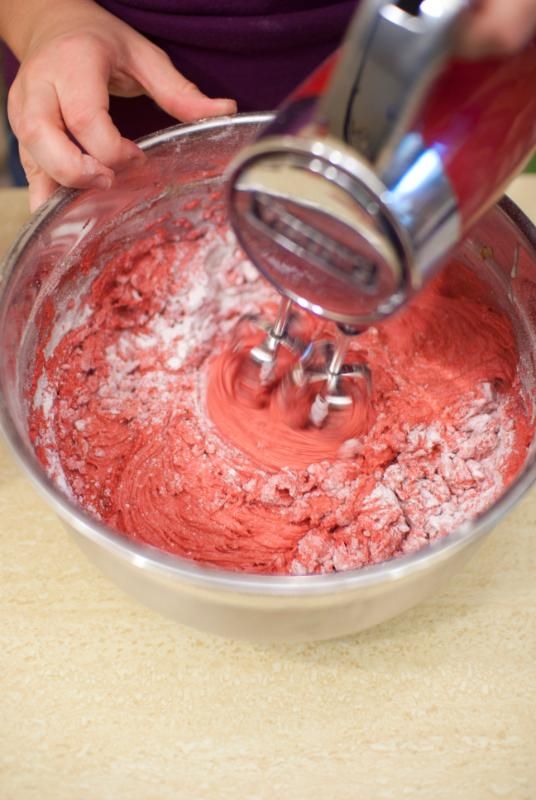
Scrape the cocoa/food coloring mix into the batter and beat to mix it evenly.
While mixing continually on low speed:
Add one third of the gluten-free flour mixture
And now: Science.

Pour batter into prepared pans. Bake in 350F oven for 20-25 minutes, until a toothpick or sharp knife comes out clean.* Cool the cakes in their pans on wire racks or folded kitchen towels for 15 minutes. Then turn them out onto wire racks, remove wax paper, and turn right-side up. Leave until completely cool. No nerd cakes allowed.
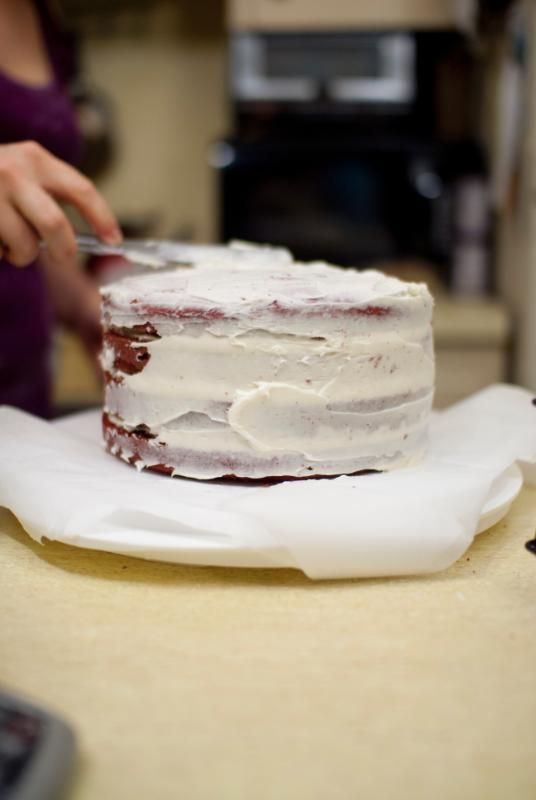
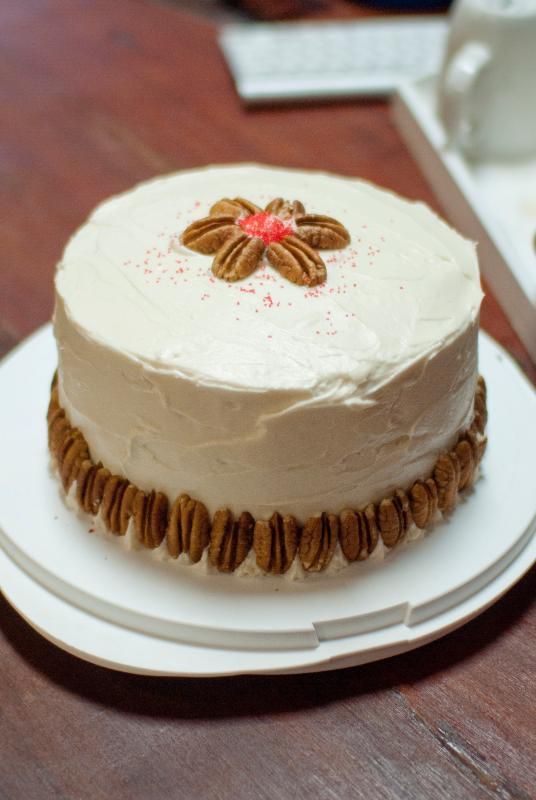
Once cakes are cool, slice them in half lengthwise to make four layers, then frost with Cream Cheese Frosting.
The office where I work celebrates its employees by having a birthday party a month for the appropriate folks. When there are more than 3 in a month, or we're just wanting extra reasons to shirk work and eat cake, we have multiple birthday parties.
Goes without saying, those months are the best.
Now because the people I work with are patient, accommodating, and selfless (practically sainted), they allow me to butt into their lives enough to actually make their respective (usually gluten-free) birthday desserts, thus foregoing their shot at the decadent cakes available at any one of our several fabulous bakeries. I imagine they do this with the same mindset as when they allow their small, begging children to decorate the Christmas tree:
"This is NOT going to go well, but it means so much to them. Why not." Beer swig.
The results are pretty much the same, too: only the bottom gets decorated, I may or may not lose interest halfway through (and subsequently half ass the rest), and I never know if the outcome is really any good because everyone's pretty much obligated to gush over it. Also I make a huge mess and lick everything.
So.
The most recent of these little adventures was a red velvet cake I made with Better Batter brand gluten-free flour (we have some wheat allergies around the office). BB swaps 1:1 with all purpose flour and requires no additional ingredients. Also there's no funky taste to it like with some gluten-free flours.
Who shall remain nameless.
Ahem.
How to Make a Gluten-Free Red Velvet Cake
Ingredients:
2 1/2 cups all-purpose flour (or Better Batter/other gluten-free flour, as in this case)
1/2 tsp salt
1 tsp vanilla extract
1 cup buttermilk (see how to make your own here)
2 T unsweetened cocoa
1 whole 1-oz bottle red food coloring (or 2 T)
1 cup (2 sticks) butter, softened
2 cups sugar
2 eggs
1 1/2 tsps baking soda
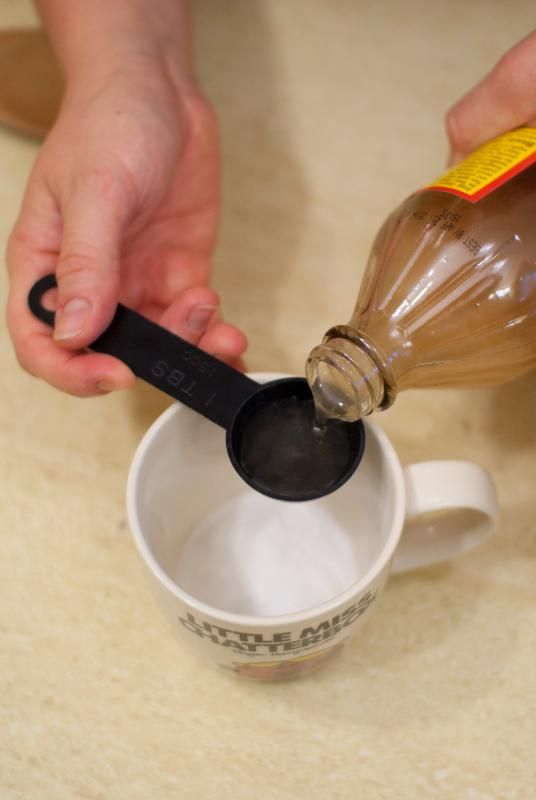
1 T cider or white vinegar
As always: trot your happy ponytail on over to the oven and preheat to 350F.
Then grease, paper, grease again, and finally flour two 9" or three 8" round cake pans. Here's a kick-ass tutorial if you've never made your own custom cake pan liners:
Combine salt and gluten-free flour in a medium (that's mama-sized) bowl with a fork or whisk. Or whatever works for you. Shoot, jump in there and run around for a bit, I ain't judgin'.
Measure out the milk, then add the vanilla and stir.
Now walk away. You got things to do.
Mix the cocoa and red food coloring together in a small bowl...er, coffee cup. Again, whatever works! Stir until you bust up all the lumps, and holler at me if you managed to keep the dye off you. Because you must have some kind of dark magic to accomplish that and I think we should be friends.
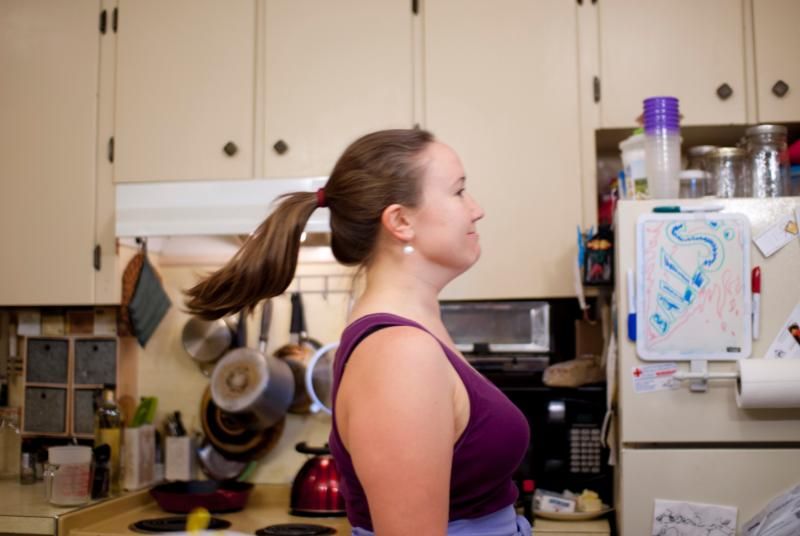
In a large bowl, beat the softened butter until creamy. Add the sugar, and beat well for 3-4 minutes, stopping to scrape down the side of the bowl when the spirit moves you. Add the eggs, one at a time, beating well after each addition until the mixture is creamy, fluffy, and smooth. No good stopping once you get two outta three.
Two tips here:
#1: If you forgot to take the butter out of the fridge until just a minute ago, it is NOT soft enough to use. Don't do it. You will sling a butter stick across the room. Instead, cut it up into smallish pieces and leave in the bowl for about 5 minutes. The increased surface area helps the butter come to room temp faster.
#2: Crack all your eggs at once into a smaller bowl. Whatever shells you drop will be easier to retrieve, your life isn't over if you happen to get a rotten one, and you can drop them into the batter without having to stop the beater. It's fabulous.
Also a bonus #3: If you have yard eggs like I did, make sure you wash them with soap before using them. Chickens just ain't go no home learnin' and they WILL give you dirty eggs.
 | |
| I am a jerk. |
Scrape the cocoa/food coloring mix into the batter and beat to mix it evenly.
While mixing continually on low speed:
Add one third of the gluten-free flour mixture
Then one half of the milk
Then one third of flour
Half milk
Flour
Fin.
And now: Science.
Place the baking soda in a small bowl (coffee cup), stand back, and add vinegar. I tellya what, this is dang magical is what this is.
Using a wooden spoon or spatula, quickly and gently fold your tiny volcano into the cake batter.
Pour batter into prepared pans. Bake in 350F oven for 20-25 minutes, until a toothpick or sharp knife comes out clean.* Cool the cakes in their pans on wire racks or folded kitchen towels for 15 minutes. Then turn them out onto wire racks, remove wax paper, and turn right-side up. Leave until completely cool. No nerd cakes allowed.
Isn't that a gorgeous color? I hereby dub it:
Jessica Rabbit Hair Red
To my coworkers:
No that is not my finger in your cake batter.
Your evidence is circumstantial.
*Note: I find that the Better Batter Gluten-Free Flour tends to be dryer than all purpose flour, so if using start checking for doneness at around 15 minutes.
Once cakes are cool, slice them in half lengthwise to make four layers, then frost with Cream Cheese Frosting.
Use the crumb coat method to preserve the lily-whiteness of the frosting.
Author's note: may I just say, the bowl/utensil
licking in this recipe is choice.
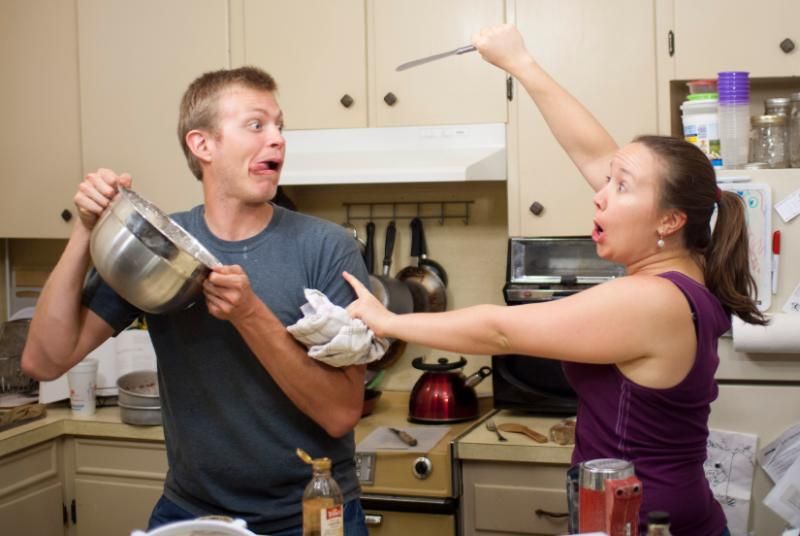 |
| Do not allow others to take away your Constitutional right to lick the bowl. If necessary, apply appropriate amounts of force. |
Thanks for comin' by! Love y'all!
4 comments:
Very helpful, very funny, and I enjoyed the pony trotting :)
Just made this cake, so fingers crossed. It's for a Valentine's dinner with 6 other architect friends in Wellington, New Zealand.
Rachel
Thanks, Rachel! Did you use the gluten free flour?
Yup sure did I have a friend who is gluten free and I wanted her to be able to partake (aren't I nice!). She mixed up the flour for me and texture was indistinguishable from "real" flour!
That's awesome! Sometimes I find that if I'm not careful, GF cakes can be very dry. So I'm glad yours was a success! Thanks for the feedback!
Post a Comment