Friday, February 22, 2013

Digger's Diary, Entry #4: I Humbly Buy Fluorescents

If you've been keeping up with my progress, you know I kicked off this venture with a plastic bin full of kitty litter and Christmas lights, with my seeds in seed starting mix in homemade newspaper/toilet paper roll pots on top, and a round grow light hanging above it all. It seemed like a darn fine system at first, for one who doesn't know what she's doing. And in fairness, the kitty litter/lights combo is probably ok, and the biodegradable pots work well. But that little light just isn't cutting the mustard when it comes to my newly sprouted seedlings. Remember those lettuce seedlings I was so excited about? Desperate to get to the out-of-reach grow bulb, they became leggy and weak, and I sealed their fate with my overzealous "everybody outdoors!" jaunt. Fjord. They are no mas.

Fortunately, the name of this game from the start has been "trial-and-error" (emphasis on the error), so onward we forge. Last night, with what meager monies remained in my bank account, I bought a cheap shop light and some fluorescent bulbs (like all of the reputable tutorials told me to do from the beginning. I know, I know). Once home, Adam helped me rig the light so it dangles 2-4 inches from the tops of my plants. They're happy now. Needy little things.

Before:


After:


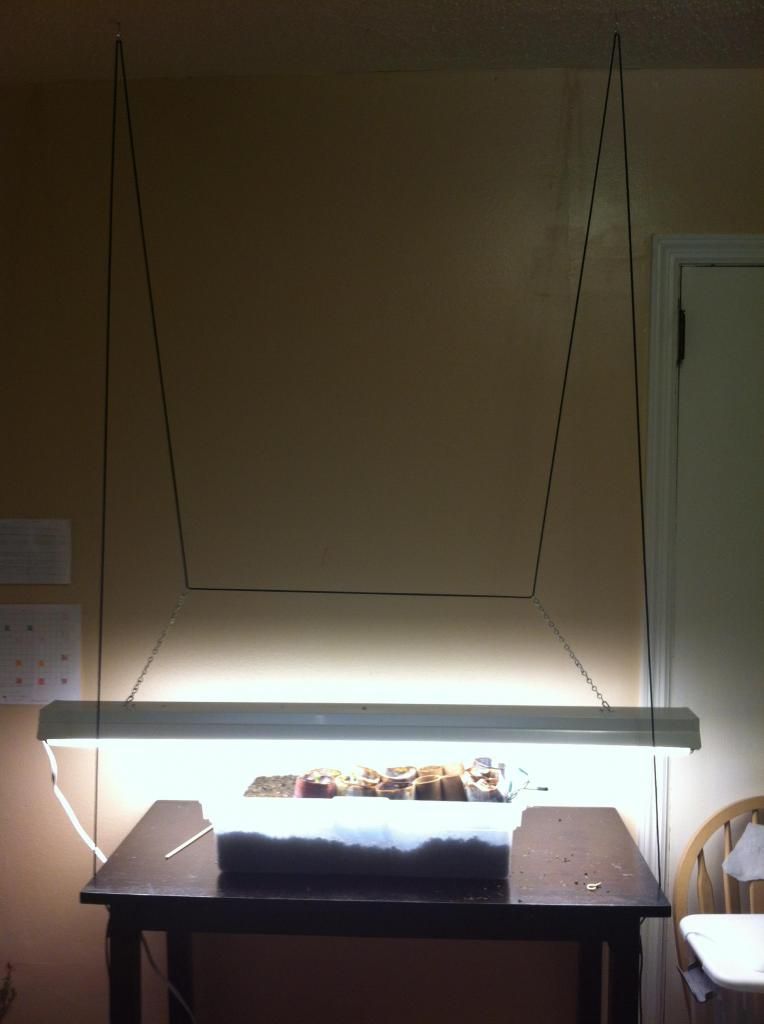
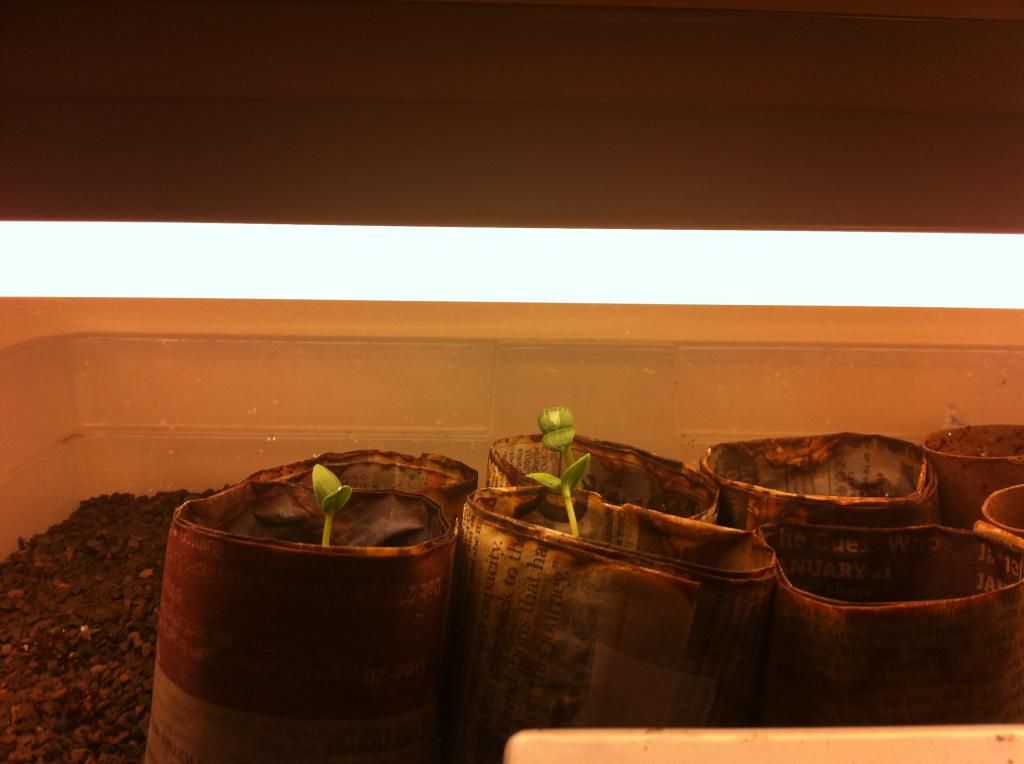
Much better. And adjustable, so as the plants grow I can raise the light. (Yes, that's how close the lights have to be to the tops of the plants).

Also, for the guys that haven't quite sprouted (bell peppers, one tomato, a few lettuces, and a cucumber):


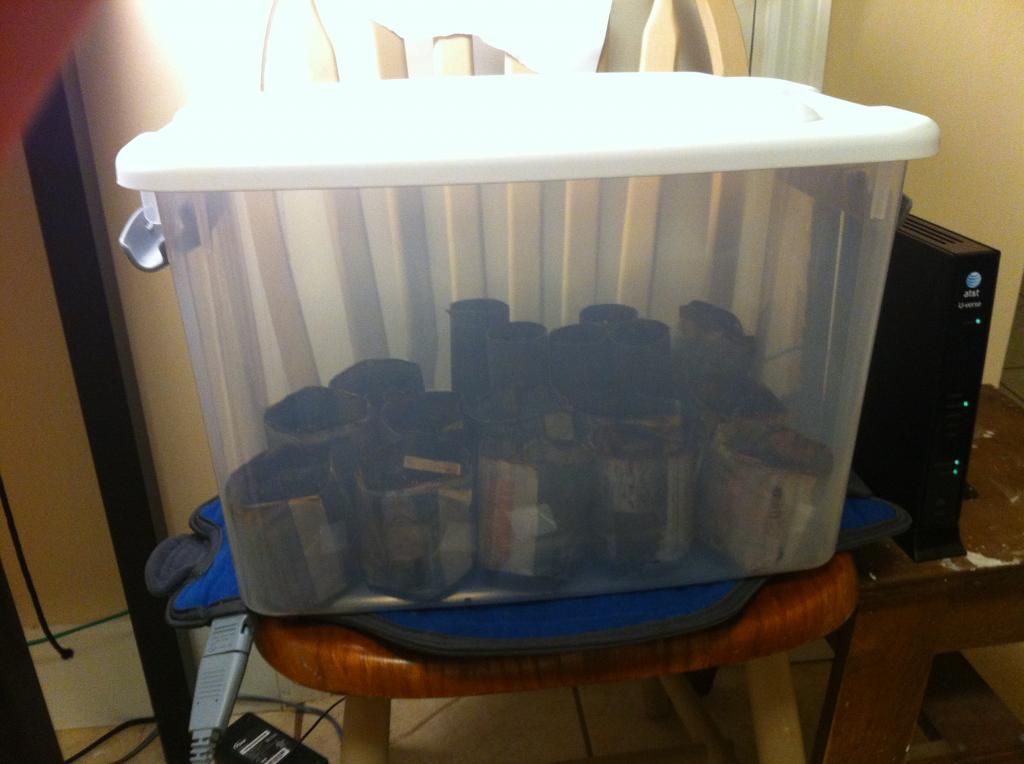
Plastic bin on top of a heating pad set to a low temperature, with sowed seeds inside. Warm and humid. Cozy, even.

What I learned: seedlings need coddling. Soooooo much emphasis on that. I didn't appreciate just how much. I thought they'd be tougher if I raised them with a bit of a laissez-faire attitude. NOPE. Don't do that, people. Seedlings are like kidnappers or terrorists. GIVE THEM WHAT THEY WANT. Your life will be easier.

Check the Gardening 101 section of my blog for some new links to websites that set me straight on seed starting.

Tuesday, February 19, 2013

Digger's Diary, Entry #3: Let the Questions Begin

First, an update: lettuce seedlings still look strong, if a bit leggy. After some research, I've learned they look like that because they haven't been getting enough light, so today everybody's going outside for some natural rays. I removed the lettuce pots from the rest of the seeds since they've already sprouted, and put the tray with the ungerminated seeds inside a loosely closed plastic bag. This creates the warm, humid, greenhouse-like environment that the seedlings must have to germinate. As each one begins poking its head up, however, they are to be removed from the greenhouse and put under 16 hours of light, with the light source positioned very close to the leaves. So I'm thinking I'm going to have to rethink my lighting situation, or at least buy another light like the one I have so that the plants don't have to reach for it.

I also found a wonderful blog that helped me sort out my seedling issues. Here she is: Northwest Edible Life: Seedstarting 101

Now, my questions. The compost bin is going, and the seeds are starting, so it's time to really get to work on my bed. I originally thought I would put all the plants in-ground, because it seems to me that you undo all the financial benefit of growing your own food when you have to shell out a ton of money for raised bed materials. But the general consensus seems to be that in-ground beds aren't even worth the trouble, while raised beds solve everything. I'm fine with the idea that raised beds make better quality plants, but I just can't get past the expense. Are they really that much better? The material to make the raised bed (cheaply bought or re-purposed boards or cinder blocks are ideal) isn't that off-putting, it's the material that goes in the bed. My own in-ground dirt is free, and I don't shy from the idea of the labor it will take to cultivate it. But garden soil from the sto' is not cheap, y'all, and to have a garden of any real size you need a ton of it. Maybe literally. So you see, I am at an impasse.

Ponder, ponder.

Sunday, February 17, 2013

Digger's Diary, Entry #2--The Compost Bin and Seeds A-Startin'

Ladies and gents! I now have (drumroll, please) a compost bin! I know, I know. Even with its gorgeously crafted chicken wire sides, you can barely contain your excitement. Me neither, it's ok. 

 My compost bin is 4x4', made of chicken wire zip-tied on 3 sides to metal stakes. The fourth side is open so I can easily turn the compost, and as the pile grows I'll be putting wooden slats across it to form an ever-growing fourth wall. Currently there's an unattached piece of chicken wire across the front, just to keep the neighborhood critters from getting at the food scraps. That's it, nothing fancy:


As for my seed starting set up, I used this tutorial to create cheap biodegradable "pots," and this tutorial to make a self-warming bed. Here's my result:


I actually already have some lettuce seedlings coming up!! It is freaking magical to me that what looks like a speck of dust has the ability to become food. Just amazing.

Till next time! 
  

Tuesday, February 12, 2013

Homemade Moonpies

Happy Fat Tuesday, y'all!! I LOVE Mardi Gras. Even more than-dare I say it?-Christmas. I love the crowds, the madness of the parades, and the fact that no matter how drunk or disorderly someone gets, he will turn around and give his beads to any little kid who wants them. (If he doesn't, the rest of us simply attack.) And even though it is POURING rain today, we will still be partying, undeterred. That's just how we roll.

I also love the parties, the excuse to drink before noon, and, of course, the food. I've already shared with you my Brioche King Cake with Apple Cinnamon Cream Cheese Filling recipe, and now it's time for the Holy Grail of Mardi Gras food: Moonpies. One word. Utterly decadent, these inside-out glorified s'mores have been the key to my heart since forever. My interest in having plastic beads winged at my head at 90 mph has waned in the last few years, but I will chase down the float that's throwing Moonpies. They are no good if bought from the store; they must be caught mid-flight from a Mardi Gras float.

Or, of course, made from scratch.

Homemade Moonpies
Recipe credit: Dixie Caviar

Monday, February 4, 2013

Gluten-Free Coconut Flour Crust

Coconut flour is an interesting addition to the gluten-free world. It's VERY fibrous, which means it can't be substituted for regular flour 1:1. In fact, it can't be substituted for regular flour...at all. It needs its own array of recipes. That does not mean, however, that it's not tasty. For those of you out there who don't like the flavor of coconut, fear not. Coconut flour does not taste like coconut flakes. This crust recipe, especially once mixed with pecans, has a nutty, buttery, toasty flavor. It's perfect for pies, the bottom of chilled desserts, cheesecakes, and probably any number of things your creative mind can come up with. Here it is pictured with a Pecan Pie I made recently:

It doesn't roll out like traditional pastry, but as you can see above once it's baked (or pre-baked) it holds its shape perfectly. I just can't say enough about this crust. Even if you don't have a gluten sensitivity, it's delicious, and for those who do, it's basically a culinary godsend.

Gluten-Free Coconut Flour Crust

Easy As (Pecan) Pie

Stickler though I have proven myself to be for keeping food in its appropriate season, for my Mama I will make any exception in the world. If she wants king cake in June, or pralines for Easter, then darnit I say "how high?"  So I have not batted an eyelash at her request, for her mid-January birthday, for a pecan pie (in my mind traditionally reserved for Thanksgiving and Christmas).

The pie crust of choice in my family is from a recipe my mom gave me when we started hunting up ways to replace the gluten foods so much of my family have foregone. Instead of wheat flour, you combine coconut flour and pecan flour, and mix with some wet ingredients to produce a yummy, nutty crust that actually holds together just like pie dough once it's baked. It's especially suited for cheesecake bases and the crust on Bonnie's Blueberry Delight (recipe to come soon), but I've used it successfully on a number of custardy tarts.


The pie itself is simple, easy, and low-mess--perfect for something you want whipped up for after a weeknight supper or a Sunday afternoon. It's an old staple of my Grandmama's, originally intended for coconut, but graciously accommodating to pecans as well. Much like Grandmama herself.

French Coconut Pie. Add Pecans. Hold the Coconut.