A good friend of mine has a (now) ten-year-old daughter who loves some show called Monster High. Maybe those of you with ten-year-old daughters have heard of it? Or those of you who are ten-year-olds at heart? Because I am a geezer, I had not heard of it until said good friend asked that I make a birthday cake for her kiddo with a Monster High theme. Soooo I got to researching, even going so far as to watch an (1) episode of the show.
I am not a fan.
Buuuuut I can see how a ten-year-old would be. Anyway. I've always seen these barbie doll cakes that people make with a doll shoved down into like 10 layers of cake flared to look like a huge ball gown and I said to myself, "Self, now that's whatcha need to do." Doll + Insane Amounts of Cake and Frosting + Mad Neon Colors of Monster High = Yessssss.
The result? Let's just say that a) I have never, never, never made such a huge mess of my kitchen. Every single utensil was dirty, furniture was moved, there was neon pink frosting on the ceiling...you get the idea. B) that was the heaviest freaking cake EVER. And forget trying to put it in a box. HA. A box. And c) guess what revisits you at your oh-so-private constitutional the morning after you eat black velvet cake with multiple colors of neon frosting? Yeah. Just...yeah.
But it was also really fun to make and a huge hit at the party. So with no further digression:
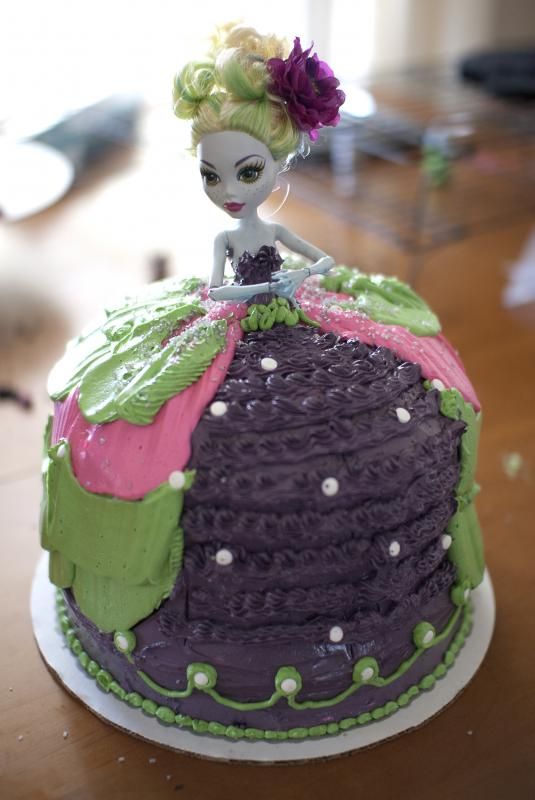
Black Velvet Cake with Vanilla Buttercream Frosting
Shaped like Monster High Ball Gown
This is more of a tutorial than a recipe. I have already blogged the recipes for both the cake and the frosting. So rather than go through the whole process of baking the Red (Black this time) Velvet Cake and making the Vanilla Buttercream Frosting (copyright Bravetart), I'll just list links to them, mmk?
Ingredients:
1. Double recipe Red Velvet Cake, using black rather than red food coloring. Either use the gluten free flour in my recipe, or substitute all purpose flour 1:1. For the Monster High cake, I used all purpose.
***VERY IMPORTANT: Unless you are a mad scientist foodie genius, do NOT attempt to make the doubled cake recipe all at once. Make the cake recipe twice. I know, it's extra work. But the mean part of baking (unlike cooking, in most cases) is that you must follow the recipe. At least until you have your Badass Degree. And doubling the amount of flour, for example, does NOT necessarily mean you double the amount of sugar, baking powder, butter, what have you.
We're dealing with Chemistry here, people. Don't eff with Chemistry.
2. Single recipe Vanilla Swiss Buttercream (if you prefer Stella at Bravetart's instructions they're here). This recipe is HUGE and takes up the whole bowl of the KitchenAid-but you will use it all. I was astonished how much dang frosting this cake took.
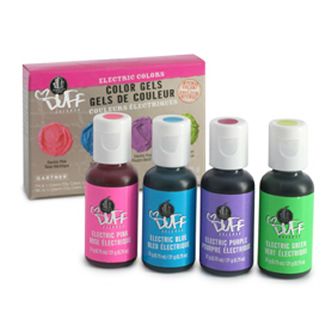
3. Food coloring GELS. Very important to use the gels, rather than the liquids that you get at the grocery store, because all the buttery fatty goodness in the frosting will repel the liquid food coloring. Yaaaaaay, Chemistry.
I used Duff brand color gels, because the colors are really intense and exactly the right kind of bizarre for the freakish doll my friend's kid chose for the cake. I mean, the doll is green. Green.
Ahhh, kids these days.
Ok. Are we ready? Awesome. Let's get this nekked doll some clothes.
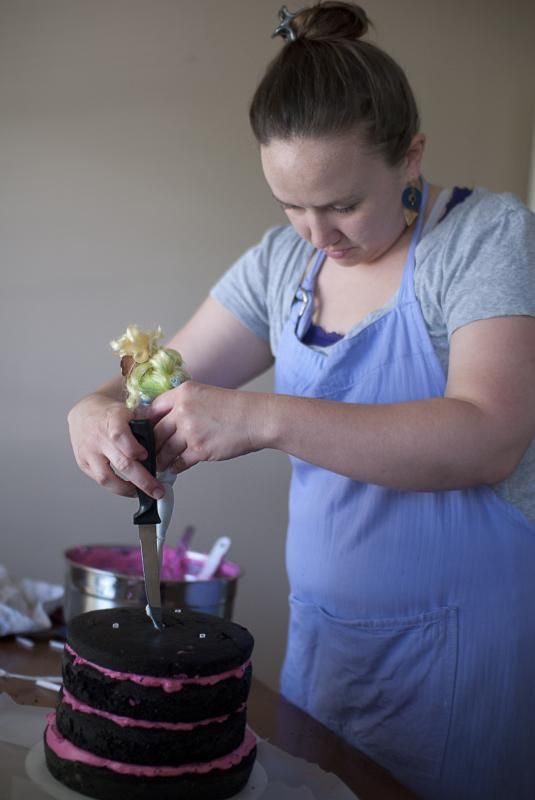
Go ahead and measure about 12 ounces of your frosting for the inside and crumb coat of the cake. A crumb coat is simply the first coat, which you don't care about because it's just the foundation for the final coat. So if it picks up a mess of crumbs while you're frosting, no problemo. Hence the name.
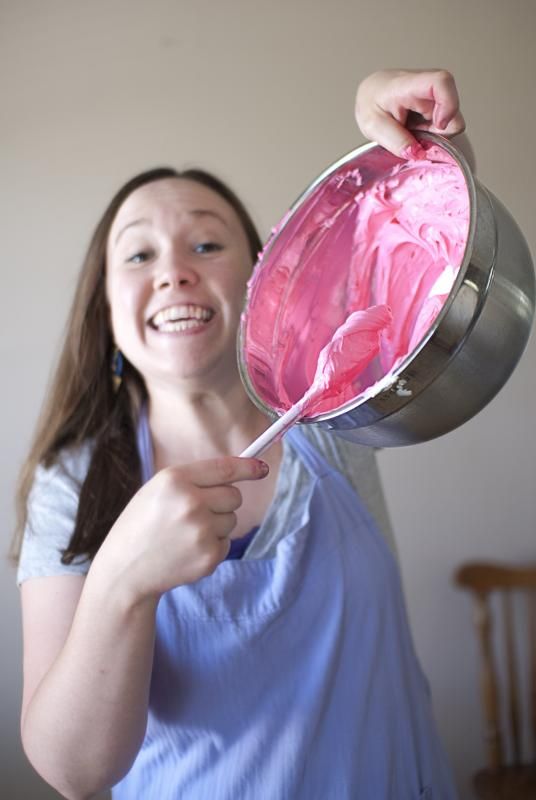
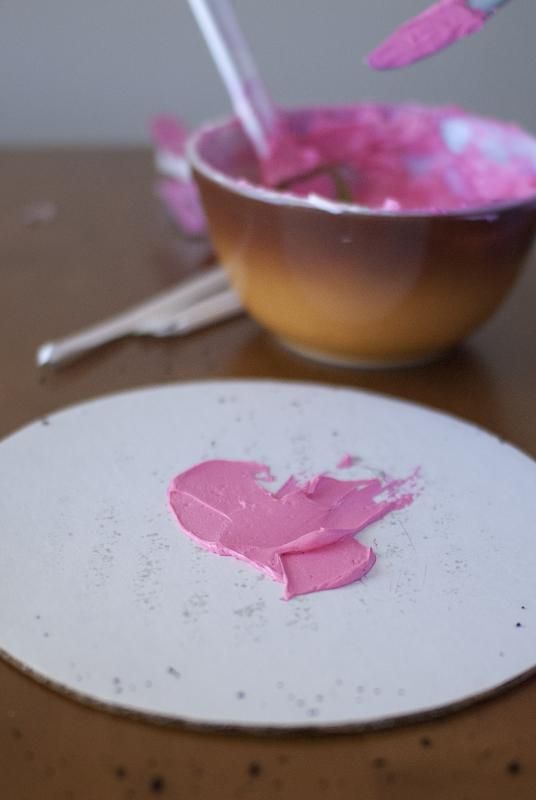
Choose what color you want for the inside. I used the neon pink in my pack of gels but obviously you can do whatever you want. You rebel.
I used the entire bottle and brother that stuff was PANK.
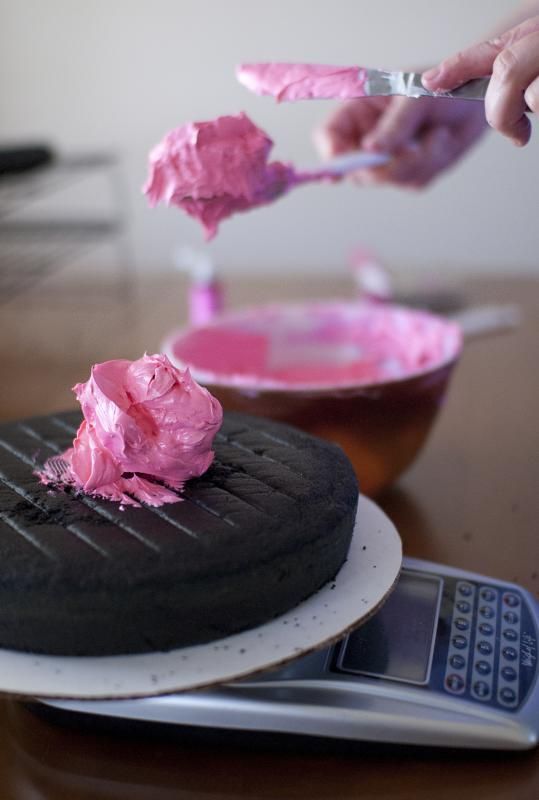
Put a dollop of frosting on your cake pan or board to secure the bottom most layer of cake.
Call me neurotic, but I like to weigh the frosting as I drop it onto the layers, to make sure I get as close to the same amount between each layer, and also to ensure I leave enough to frost the outside.
I've always been bad to skimp the in-betweens, scared I wouldn't have enough for the outside. This eliminates that problem.
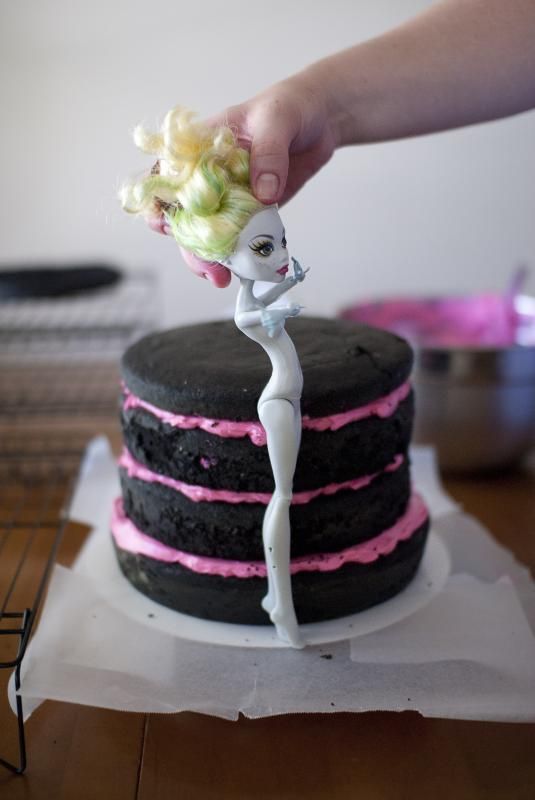
Once you've finished frosting between the layers, hold your doll up next to the cake to see if any adjustments are necessary. Remember the final coat of frosting will be thick, so you want the unfrosted cake to come no higher than her hip joint.
My cake was just a tad too tall, so I had to saw my top layer in half longways.
Um...just censor bar ole No Pants Nancy there in your mind. Thanks.
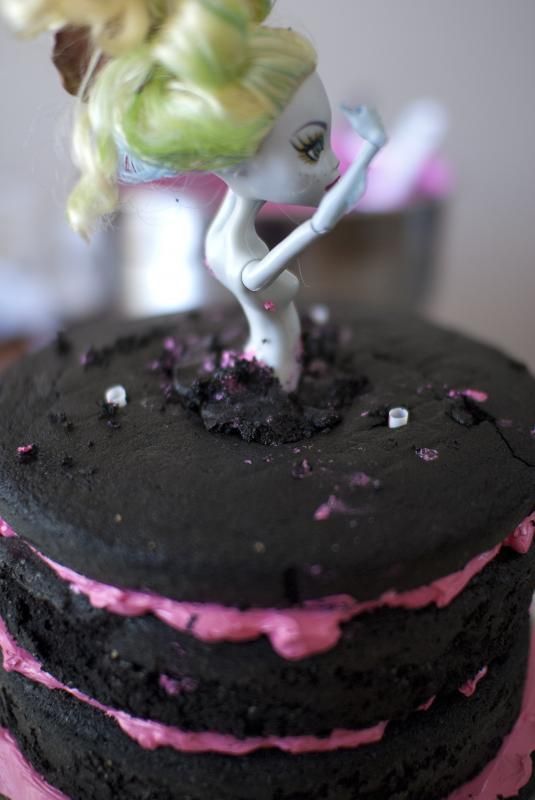
DON'T STICK THE DOLL IN YET. I just used this picture because it's the best one I have of the drinking straws.
Take 3 drinking straws and place them approximately 1 inch from the edge of the cake in a triangular form. Cut off whatever sticks out of the top.
Using a serrated knife, cut a 45 degree angled piece from the top layer, all the way around. You're going for a slope so the top of your dress is rounded, not square.
Now we'll stick the doll in. Hover her over the center of the cake so that her feet just touch it. Using the tip of a serrated knife, make a mark straight down from the widest part of her lower body. In my case, this was the hips (barely. Ole girl needs a cheeseburger.) Continue until you have a circle she can drop into.
Using the same knife, gently saw down and around the circle. Take a spoon and scoop out what you've just cut, but don't throw it away or eat it. (Yet)
Place the doll down into the cake, pushing until her feet touch your plate or board. Pack enough of the excess cake around her so that she stands on her own. Now you can eat the rest.
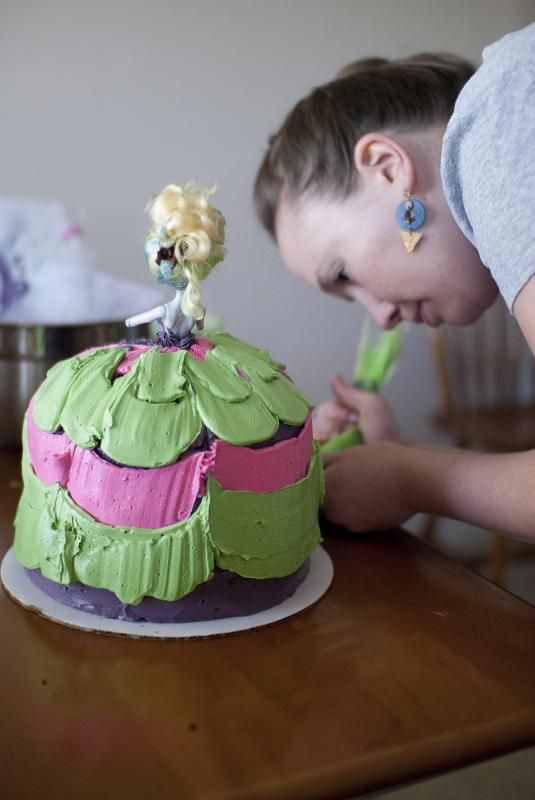
How you decorate your doll cake is completely up to you. I followed the tutorial in this video to the best of my ability, using purple (was supposed to have been black but whateva) frosting for the top coat and alternating green and pink frostings for the ruffles of the skirt.
I used the purple frosting again for the bodice and for the petticoat in front, and the white "pearls," (no they are NOT baby aspirin) were just some sprinkly things I had laying around.
This is the creative part. Sky's the limit.
Voila! You have just made a fabulous, delicious doll cake. If you made my recipe, using the colors I chose, get ready to heft the heaviest cake you've ever met, and to watch your mouth (among other things) turn unholy and inhuman colors! Thanks for stoppin by, y'all. See you next time!
Happy Birthday, Aidan!!!!!!!
All photos (except for image of Duff color gels) by Michelle Goldman/Brainchild Theories
8 comments:
Lagoona looks beautiful. :'3
Thank you!
So you use straws to hold all the layers together? I love it! I hate those wooden rods. They're always a pain to cut and I'm forever afraid someone's going to choke on a splinter. How heavy was your cake? How much weight do you think a straw can hold?
The cake was approximately as heavy as one overweight housecat. It took two of us to carry it so it wouldn't topple. How much weight a straw can hold depends entirely on how the straw is used, I suppose. And in this particular case, 3 straws pushed into four layers of cake can hold...one housecat. :D
Sadly, I immediately recognized Lagoona in your cake and wondered why there's no blue on her dress. She's water-based, ya know! ;) Yeah, that's what having twin 10-year-old girls will do for you. You suddenly know this stuff!
Obviously, I know zilch about these gals! She was handed to me nekked and I was just trying to coordinate with the green in her hair. And if the birthday girl noticed she didn't say anything :) she knows my pop culture limitations and is very patient!
Straws are SO much easier to use to hold the layers together! I used dowels on my first few cakes, then got a helpful tip from a fellow sugar artist and have been using straws since! So much easier to cut (no shavings or splinters like with wooden dowels, and no pieces of wood flying everywhere when you cut them lol!)I myself use "fat boba straws", they're wider and thicker than normal sized straws, and they're easier to get ahold of when pulling them out, before cutting the cake. $11.95 for over 120 of them on eBay! :D Thanks for the tutorial!!
That's a great idea, Angel! I didn't even think of the boba straws but I'm sure they do work better. I'll definitely use them next time, thanks!
Post a Comment